Part 1: Game Board Design
|
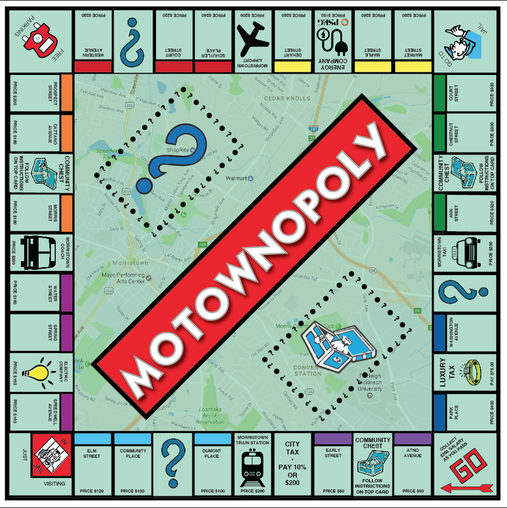
For my first project of the second marking period, I decided to create a board game. One of my favorite board games is Monopoly so I decided to create a Monopoly game about Morristown and call it Motownopoly.
I designed my 5x7 board in Illustrator CS6. Every tile on the board is significant to the town of Morristown and also to the Monopoly game. For example, most of the streets of Morristown are on the board and the transportation we use in town are on the board. I used clipart for the images on the board such as the airplane, the train, coach bus and the Morristown taxi. For the background of the board, I looked up a google map of Morristown and I took a screen shot of the main area of town. Then, I made an overlay and created a clipping mask to place it in the back. Below, I screenshoted the overlay in full detail so you can get an upclose look of the opacity. I made the opacity for the background 40%. I made a rectangular box and found the Monopoly font (Kabel Book). Then, I made the text white in all caps. I added a dropshadow and made the stroke gray like the traditional Monopoly board game. This project was a bit challenging for me at first because its a massive amount of work due to the many components of the game. I had to rethink the design of the original game in terms of my subject, Morristown. I needed to gather photos and information regarding places, streets and areas of transportation. I had to put a ton of planning and effort into creating a cohesive theme throughout the game. While planning, I had to make sure it reflected Old Historic Morristown. 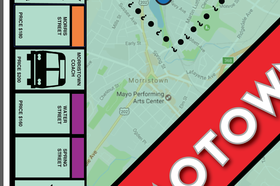
|
Part 2: Card Design
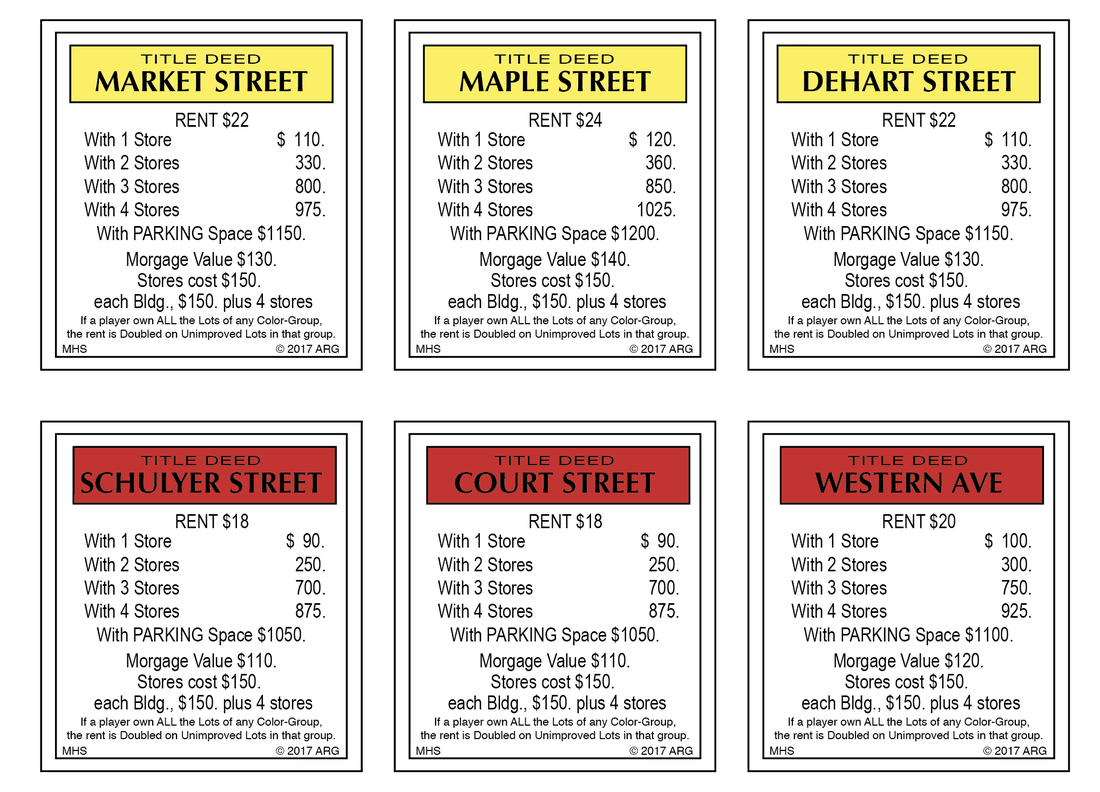
The Monopoly cards were based on popular streets and transportation throughout Morristown. I used Illustrator CS6 to create the template. The cards are 2.5'x 3'.
The house section on a typical monopoly I changed to stores and instead of a hotel they could purchase a parking spot. First, I created the actual outer box of the card. Then, I created a color box at the top of the card .5' x 2'. After, placed sample text for the "Deed" and the "Street Name" and then I filled the box with the corresponding color. I then layed out the remaining text for the card and grouped it together. I copied and pasted the template 22 times and changed the information and color on each card with various streets to reflect the correct color section on the board.
After, I made a template for the back and followed the same steps above as well as making a card template front and back for the transportation cards and two energy cards. I even gave myself a copyright in the bottom right hand corner! The cards were very simple to make.
I attached the images of all the cards below.
Front of Cards:


Back of Cards:


Money:
In order to make the money for the game, I created a template that was 2.25' x 4'. I found a photo historic Morristown of George Washington's battle that I used as a central focal point of my bill. Then, I placed the title of my game underneath it and the four boxes in each corner represent the dollar amount and dollar sign. I then placed a graphic effect behind the money as well as a rectangular box with an opacity of 45% of a color. I grouped and copied the bill 7 times to represent the various amounts on the Monopoly board and changed the denomination and color to represent the different amounts.


Chance and Community Chest Cards:

Making the Chance and Community Chest cards was a learning process for me. First, I started off by looking up the icons that will go on the cards. I set up a letter size page in Photoshop with a transparent background and a resolution of 300 DPI. I then created a new layer and placed the sheet of icons there.
Under adjustments, I went to the curves, and made adjustments to the image so I had a clear, strong image of the icons. Then, using the magic wand tool (Command W) I clicked on the page (where each image appeared selected) and before hitting delete I unchecked the box labeled contiguous. All that was left to do was hit the delete button which erased the background. I was now able to incorporate each image into my document by selecting a given image and dragging it into Illustrator. I repeated this step for each of the given cards, placing a different icon on each one and formatting the text.
See the finished product below:


Part 3: The Box Design
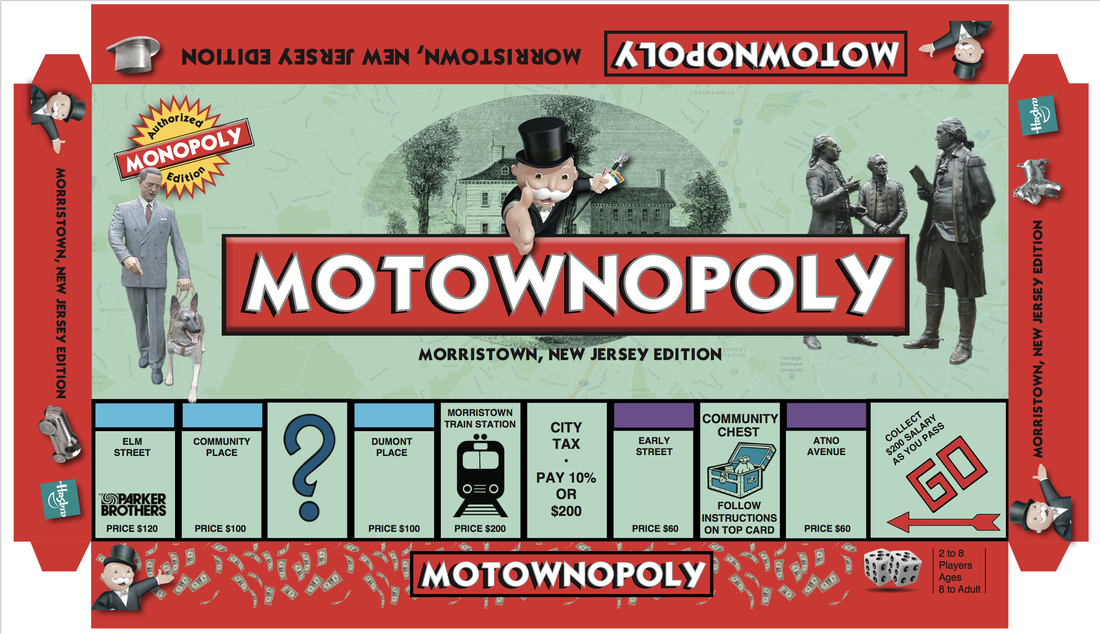
The Front:
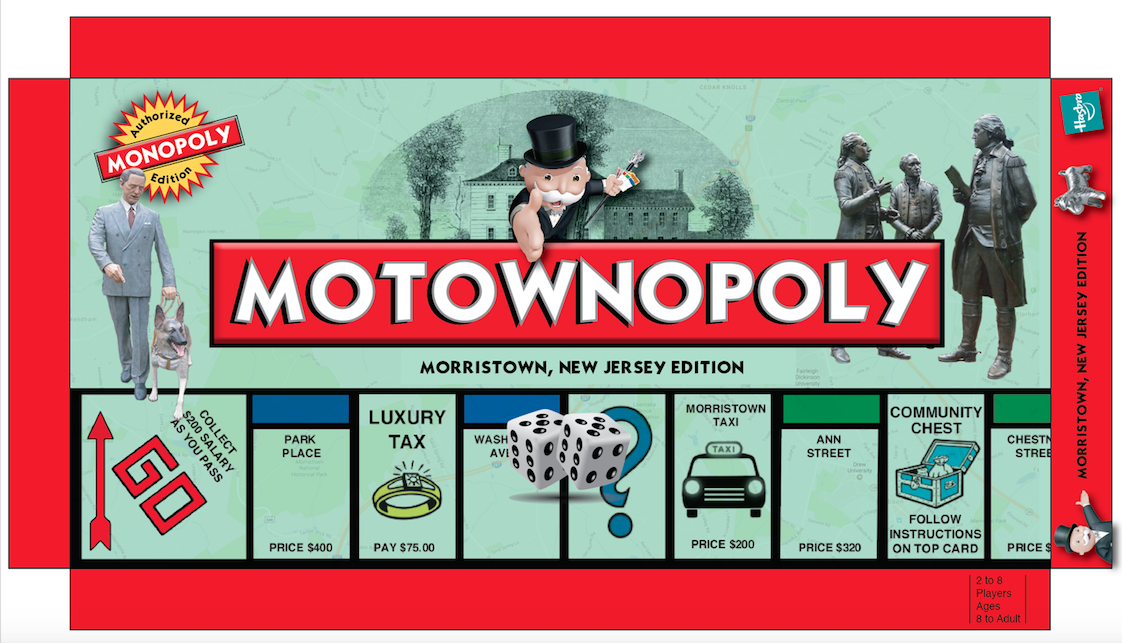
This was the early version, before all of the other sides were completed.
|
For the final part of my Monopoly board game, I made the package design. First, I found all of the measurements of the actual board game. The top of the box is 20x10. The two short sides of the box are 10x1.25'' and the long sides of the box of 20x1.25''. Then, I used the logo that I made for the Motownopoly board for the game on the main part of the package design. I then, found an image of the Ford Mansion which is an iconic place in Morristown and placed it in, changed the opacity to multiply with the background. I created the starburst in the upper left hand corner in illustrator. I used the star making tool and set it to the desired amount of points I wanted. Then I gave it a fill and stroke of the red and yellow colors shown below. I used the circle tool and made a circle inside the starburst. I used the type on a path tool to write the word "Authorized". Then I moved it to my desired position. I then duplicated the circle and changed the word to "Edition" and moved it to the inside of the second circle and slid it into position. I brought in the Monopoly logo in the middle of the burst and rotated it on a slant. I grouped all the parts and lastly, gave it a drop shadow to complete the look.
I located two very famous statues and brought them into photoshop and traced them so I could delete the backgrounds and then brought them back onto the board and changed the size to fit nicely on the board. After,I cut a section of the actual board I created and placed that at the bottom of my cover. I found a great set of dice that I dragged in to give the cover some depth and realistic look. In keeping with the real Monopoly look, I added the main guy in the top hat to complete the iconic Monopoly look. I also copied the section of his hand and placed it on top of the logo to give it a more in-depth look. I decided to make the sides of the board red and I found some typical pieces in the Monopoly game such as the hat, the dog and the car. I incorporated the Monopoly guy on all the sides and added drop shadows behind every image I placed on the sides. Also, I added the Motownopoly box on the two bigger sides and three of the sides says the "Morristown, New Jersey Edition" to make one of the sides unique. For the main side that says, Players 8 and Up I made the background rain money to give it a different effect. I selected the image and set it to high quality so it could be clear on the Monopoly package design. At first this project was a challenge, because I have never done package design before. But once, I got the measurements down and had some ideas the project was overall a fun experience for me. Eventually, I would like to feature my board game in the Art and Design Show this Spring. See the finished product below: |
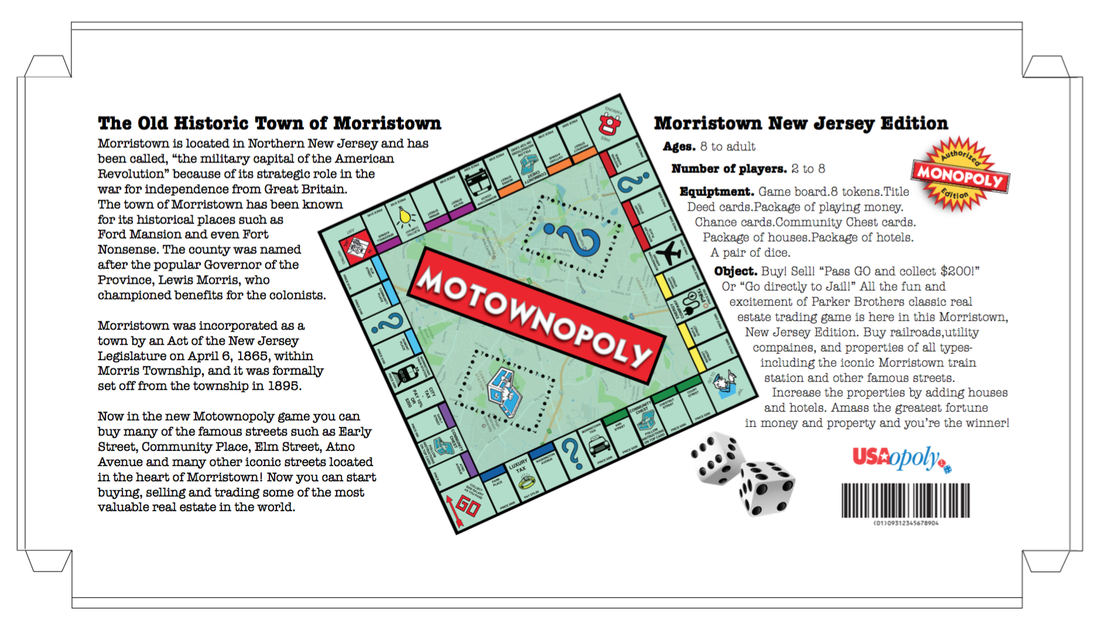
The Back:
I based the back of the board off of the original board game. Making a more simplified view of the existing cover. The length is the same, however, I reduced the height of this box overlay by 0.125 inches. I created a text wrap around the image of the actual board game to include the history of Morristown and the directions/ set up of the game. My goal throughout the design process was to give the front and back lid of my game a realistic look. I tried to included an image of a barcode on the game and making it an official Monopoly game, as you see in the alternative versions of the original game. As stated in the previous post about the front lid, I used the same logo that I created for the main lid that says,"Authorized Monopoly Edition" and placed that on the right side of the back by the directions.
Part 4: Spray Mounting Process
The actual prototypes are attached below for this project. I have never done a prototype before, so at first figuring out the routine was difficult but once I got the swing it ended up being a fun project.
First, I started off doing the lid for the top of the board. I cut out everything with the exacto knife as well as the cardboard template that goes underneath the main lid. I spray mounted those two items together and then I put it on the actual game box cardboard. I then repeated the same routine for the bottom lid of the box. Also, I hot glued the interior of the box for the sides that fold in so everything stays in place nicely. After the main parts of the box, I spray mounted the board which was easy because now I know how to spray mount pieces together. For the cards and the money, I printed everything out and glued them together. Which ended up being an easy process.
Overall from the prototyping experience, I learned that everything has to fit together nicely and this project takes a lot of time. Also, I realized that people can't rush in the prototyping process. Not everything will be perfect on the first try, you have to try multiple tests to see if everything fits. Then if everything fits, then you know its nice. I think that this project challenged me but at the same time it helped me see what its like to make a prototype for an actual board game. As an end result, I am proud of the work that I have done for this project and I can't wait to see what people think of it at the Art & Design show in June.


